If you want to add a personal touch to your workspace, learning how to make your own desk name plates is a fantastic idea. Custom name plates enhance professionalism, improve office organization, and allow for creative expression.
In this guide, we’ll explore five unique methods to make your own desk name plates, including materials, tools, and design tips to help you create the perfect name plate for your desk.
1. Why Make Your Own Desk Name Plates?
Before diving into the DIY process, let’s look at why crafting your own name plate is beneficial:
Personalization – Choose fonts, colors, and designs that reflect your style.
Cost-effective – Save money compared to buying pre-made name plates.
Unique designs – Stand out with custom artwork or branding.
Perfect fit – Adjust the size and shape to match your desk perfectly.
Whether for an office, home workspace, or a special event, a DIY name plate adds a professional yet personal touch.
2. Materials Needed to Make Your Own Desk Name Plates
The materials you choose will determine the look and durability of your name plate. Here are some popular options:
A. Wooden Name Plates
Sanded wood plaques
Wood stain or paint
Laser engraving or hand-lettering tools
B. Acrylic Name Plates
Clear or colored acrylic sheets
Vinyl cutters or etching cream
Adhesive stands
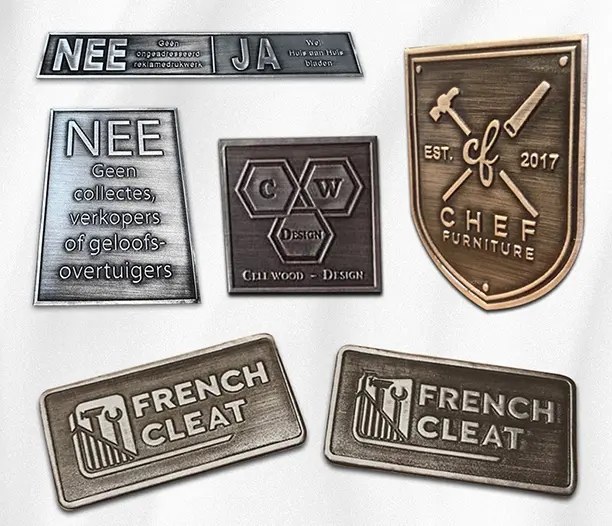
C. Metal Name Plates
Aluminum or brass sheets
Metal engraving tools
Polishing cloth
D. Printable & Laminate Name Plates
Thick cardstock or printable plastic
Laminator for durability
Double-sided tape
Each material offers a different aesthetic, so choose based on your skill level and desired finish.
3. Step-by-Step Guide to Make Your Own Desk Name Plates
Now, let’s walk through the process of creating a custom name plate.
Method 1: Wooden Engraved Name Plate
Choose a wooden plaque (pre-cut or cut to size).
Sand the surface for a smooth finish.
Stain or paint the wood (optional).
Engrave your name using a laser cutter or wood-burning tool.
Apply a sealant for protection.
Method 2: Acrylic Name Plate with Vinyl Lettering
Cut acrylic sheet to desired size.
Design your name on a vinyl cutter.
Apply the vinyl decal onto the acrylic.
Attach adhesive stands for a freestanding plate.
Method 3: Printable & Laminate Name Plate
Design in software (Canva, Word, or Photoshop).
Print on thick paper or plastic.
Laminate for durability.
Attach to desk with double-sided tape.
Each method varies in complexity, so pick one that matches your crafting skills.
4. Design Tips for Professional-Looking Name Plates
A well-designed name plate looks polished and professional. Follow these tips:
Font Selection – Use clean, readable fonts like Arial or Helvetica for offices.
Color Schemes – Match company branding or keep it neutral (black, gold, silver).
Logo Integration – Add a company logo for an official touch.
Size & Proportion – Ensure the name plate isn’t too large for the desk.
If you’re unsure, browse templates online for inspiration before finalizing your design.
5. Creative DIY Desk Name Plate Ideas
Want something beyond the traditional? Try these creative twists:
A. Chalkboard Name Plate
Paint a wooden plaque with chalkboard paint.
Write your name with chalk (easy to update).
B. LEGO Name Plate
Build your name using LEGO bricks.
Attach a baseplate to your desk.
C. Floating Magnetic Name Plate
Use magnetic sheets for a sleek, modern look.
Attach to metal desks without adhesives.
D. Glow-in-the-Dark Name Plate
Use glow-in-the-dark paint or vinyl.
Perfect for creative workspaces.
These ideas make your desk stand out while keeping functionality intact.
6. Where to Use Custom Desk Name Plates
Beyond offices, DIY name plates have multiple uses:
Home Offices – Personalize your workspace.
Events & Conferences – Temporary name tags for guests.
Classrooms – Help students and teachers with desk assignments.
Retail & Reception Desks – Professional branding for businesses.
A custom name plate enhances organization and professionalism in any setting.
Learning how to make your own desk name plates is a fun and practical project. Whether you prefer wood, acrylic, or printable designs, there’s a method for every skill level.
By following this guide, you can create a professional, personalized name plate that enhances your workspace. Ready to start? Gather your materials and unleash your creativity!
Have you made a DIY name plate before? Share your tips in the comments!