Putting your logo on metal parts isn't just about branding. It's about permanence, professionalism, and durability. Whether you're marking tools, creating nameplates, or branding custom products, stamping logo on metal offers a classic, reliable solution.
But the term "stamping" can mean different things. The best method depends on your budget, volume, metal type, and the detail in your design.
This article breaks down the five primary techniques for metal logo stamping. We'll compare how they work, their costs, and when to use each one. By the end, you'll know exactly how to get your logo onto metal effectively.
What Does "Stamping a Logo" Actually Mean?
In a broad sense, stamping logo on metal refers to any process that uses force to impress or deform a metal surface to create a mark. Unlike printing or etching, stamping physically changes the metal.
This creates a mark that won't rub off, fade, or wear away easily. It's a subtractive or forming process, not an additive one. The result can be indented (debossed) or raised (embossed).
Understanding this helps you talk to suppliers and choose the right technique for your custom metal stamping project.
Method 1: Traditional Press Stamping (Hard Tooling)
This is the industrial powerhouse. It uses a custom-made steel tool and die set, mounted in a powerful press.
A flat sheet or piece of metal is placed between them. With tremendous force (often tons), the press closes. The tool stamps the logo into or through the metal in one hit.
Best for:
- Very high-volume production (thousands to millions of parts).
- When the logo is part of a larger formed part (like a car badge or appliance panel).
- Extremely consistent, fast marking.
Considerations:
- High initial cost: Creating the hardened steel tool (the "stamp die") is expensive and time-consuming.
- Inflexible: Changing the logo requires a whole new, costly tool.
- Not for prototypes: The setup cost is prohibitive for small runs.
If you need a million identical brackets stamped with your logo, this is the most efficient metal stamping service path.
Method 2: CNC Punch Press Stamping
This method uses a CNC (Computer Numerical Control) turret punch press. Instead of one custom tool, the machine uses a library of standard shaped punches (like a small square, circle, or triangle).
The machine's computer program rapidly moves the sheet metal and selects punches to "draw" your logo through a series of small hits. It can create perforated logos or intricate outlines.
Best for:
- Low to medium volume sheet metal parts.
- Logos that can be created from a series of cutouts or indentations.
- Integrating the logo cut into a larger part fabrication process.
Considerations:
- Limited by available punch shapes; fine detail or smooth curves can be challenging.
- Creates a pierced or dimpled effect rather than a smooth, stamped impression.
- Ideal for functional, industrial looks rather than refined branding marks.
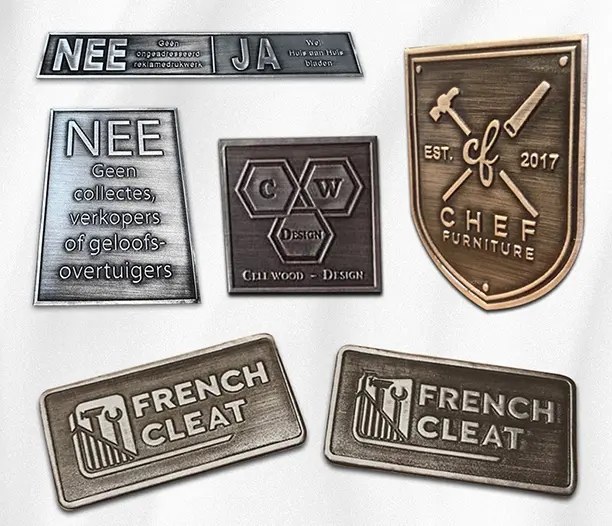
Method 3: Manual Hammer Stamping
This is the classic, hands-on approach. A hardened steel stamp with your logo raised in reverse is placed against the metal workpiece. A heavy hammer blow is struck onto the stamp, transferring the impression.
It's a fundamental form of stamping a logo onto metal, often used by jewelers, blacksmiths, and for one-off tools.
Best for:
- Very low volume, prototypes, or artisanal work.
- Irregular or curved surfaces (like a tool handle).
- Adding serial numbers or dates alongside a logo.
Considerations:
- Inconsistency: Each strike can vary in depth and alignment.
- Labor-intensive: Slow for more than a few pieces.
- Skill-dependent: Requires a steady hand to avoid double-strikes or misalignment.
For a small batch of custom knives or personalized hardware, manual stamping is accessible and cost-effective.
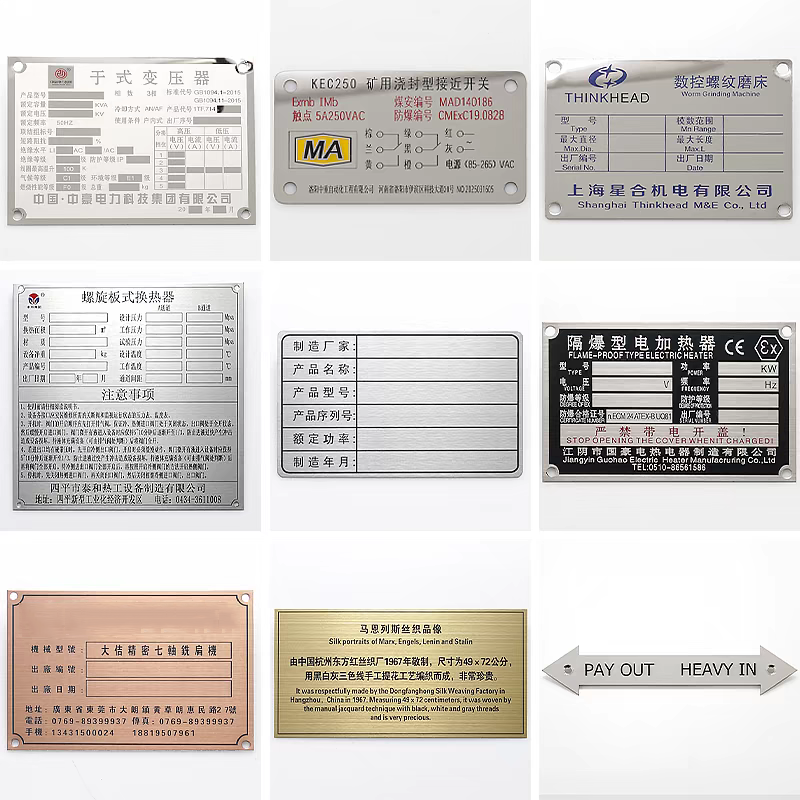
Method 4: Press-Applied Etching Stamps (Marking Presses)
These machines, like bench-top marking presses, use a pneumatic or hydraulic ram to apply controlled force. They use pre-made stamping dies (like in Method 1) but are designed for lower force and smaller parts.
They offer a middle ground between manual hammering and industrial press stamping.
Best for:
- Small to medium batches (dozens to thousands).
- Marking finished products like tags, medals, or small machine parts.
- When a deeper, cleaner impression than hand stamping is needed.
Considerations:
- Still requires a custom stamp die, though smaller and less costly than for large industrial presses.
- Offers excellent consistency and control over impression depth.
- A popular choice for businesses offering custom metal stamped tags and labels.
Method 5: Roll Stamping (Roll Marking)
This process uses two hardened steel rolls. One roll is engraved with your logo (in reverse, and often repeated). The metal part (typically cylindrical like a pen, tube, or syringe) is fed between the rolls.
As the rolls turn and press together, they transfer the logo onto the moving part. It's a continuous, rolling impression.
Best for:
- Cylindrical or round metal objects.
- High-speed, continuous marking on items like wires, pins, or medical devices.
- Applying repeating patterns or text along a length.
Considerations:
- Almost exclusively for round or nearly round workpieces.
- Setup can be complex, but it's extremely efficient for the right part geometry.
How to Choose the Right Method: A Quick Guide
Selecting a technique for stamping logo on metal comes down to four factors:
- Volume: How many pieces do you need?1-10: Manual Hammer or simple etching.100-5,000: Press-Applied Etching or CNC Punch.10,000+: Traditional Press Stamping.
- Detail & Size: How intricate is your logo?Fine, detailed logos need the sharp, controlled impression of a press-applied or traditional stamp.Large, bold logos work with almost any method.Tiny logos may rule out manual hammering due to alignment issues.
- Material: What metal are you using?Softer metals (aluminum, brass, copper) stamp easily with less force.Hardened steel or titanium requires much greater force and harder stamp dies.
- Budget: What can you spend upfront?Low upfront cost: Manual stamping or using a vendor's existing die.High upfront, low per-part cost: Investing in a custom die for high-volume production.
Preparing Your Artwork for Metal Stamping
To get a quote or start production, you'll need to provide your logo. Vector artwork (AI, EPS, SVG) is mandatory. Raster images (JPG, PNG) cannot be used to make a stamp die.
Key preparation tips:
- Simplify: Overly complex gradients or tiny text may not stamp clearly.
- Line Weight: Ensure lines are thick enough to be impressed into metal without breaking the stamp tool.
- Discuss with Your Supplier: A good metal stamping service will advise on design modifications for stampability. They may suggest converting solid areas to outlines for a cleaner result.
Cost Factors for Stamping a Logo on Metal
Costs break down into two main areas:
1. Tooling Cost (The Stamp Die):
This is the one-time cost to manufacture the hardened steel (or brass) stamp that carries your logo. Complexity, size, and material determine the price. It can range from $50 for a simple, small hand stamp to thousands for a large, intricate press die.
2. Per-Piece Processing Cost:
This covers the metal blank, the labor/ machine time to stamp it, and any secondary finishing (cleaning, plating, painting). Higher volumes drastically reduce the per-piece cost, especially after the tooling is paid for.
Always ask for a breakdown: "What is the tooling cost, and what is the per-unit cost at my desired quantity?"
Deep Dive: The Anatomy of a Stamp Die
Understanding the tool itself helps visualize the process. The die is a mirror-image, raised version of your final logo. For a debossed (indented) mark, the die is positive. The metal flows around it, creating the indentation.
The die must be harder than the metal it's stamping. Tool steel is heat-treated to extreme hardness. Precision grinding or CNC machining creates the logo features.
Wear over time is a factor, especially on high-volume runs or hard metals. A well-made die can last for hundreds of thousands of impressions.
Frequently Asked Questions (FAQs)
Q1: What is the difference between stamped and etched logos on metal?
A1: Stamping physically deforms the metal, creating a raised or indented mark. Etching (chemical or laser) removes a shallow layer of material, creating a recessed mark without significant deformation. Stamping is generally more durable and tactile, while etching can handle finer detail on hardened surfaces.
Q2: Can I stamp a logo on painted or coated metal?
A2: Yes, but the result varies. Stamping will typically crack or displace the coating, revealing the bare metal underneath. This can create a high-contrast look. If you need the coating to remain intact over the logo, a method like laser marking might be better suited.
Q3: How deep can a logo be stamped into metal?
A3: Depth depends on the metal's ductility and the force applied. In soft metals like aluminum, impressions of 0.5mm or more are common. For harder steels, it may be only 0.1-0.2mm. Your stamping service can advise on achievable depth for your specific material.
Q4: What file format do I need to provide for a custom stamp die?
A4: You must provide a vector file. Common formats include .AI (Adobe Illustrator), .EPS, or .SVG. These formats use mathematical paths, not pixels, allowing for perfect scaling and toolpath creation. A high-resolution PNG or JPG is not sufficient.
Q5: Is metal stamping suitable for very small, delicate parts?
A5: Yes, but it requires precision tooling and the right method. A small, press-applied etching stamp or a specialized micro-stamping process is used for items like tiny electronic components or jewelry. The main challenge is holding the part securely and aligning the stamp perfectly.