If you work with chemicals in any capacity, you’ve probably heard about GHS labels. But if you’re wondering exactly how to make a GHS label that meets regulatory standards, you’re not alone. The Globally Harmonized System (GHS) for classifying and labeling chemicals is a globally recognized framework designed to ensure safety by communicating hazards clearly. Whether you’re in manufacturing, logistics, or a small lab, creating compliant GHS labels is crucial for protecting workers, avoiding fines, and streamlining operations. In this article, I’ll walk you through a straightforward, step-by-step process on how to make a GHS label, drawing from real-world experience and best practices. By the end, you’ll have a clear roadmap to produce labels that are both effective and legally sound.
Understanding the Basics of GHS Labels
Before diving into the steps on how to make a GHS label, it’s essential to grasp what GHS entails. GHS, or the Globally Harmonized System, was developed by the United Nations to standardize hazard communication across borders. It replaces a patchwork of national systems with a unified approach, using pictograms, signal words, and hazard statements to convey risks. A GHS label isn’t just a sticker—it’s a critical tool for safety. If you’ve ever seen a chemical container with a flame symbol or the words “Danger,” you’ve encountered a GHS label. These labels help prevent accidents by making hazards instantly recognizable, which is why learning how to make a GHS label correctly can save lives and reduce liability.
The importance of GHS labels extends beyond compliance. In many countries, regulations like OSHA’s Hazard Communication Standard in the U.S. mandate their use. Non-compliance can lead to hefty penalties, but more importantly, it risks worker health. When you master how to make a GHS label, you’re not just checking a box—you’re building a culture of safety. This process involves identifying hazards, gathering data, and designing labels that are easy to understand. As we move into the steps, remember that the goal is clarity and accuracy. Let’s break down how to make a GHS label into manageable parts, so you can apply this knowledge confidently in your workplace.
Step 1: Identify the Hazard Classification of Your Chemical
The first step in learning how to make a GHS label is to determine the hazards associated with your chemical. This isn’t a guessing game; it requires a methodical approach based on GHS criteria. Chemicals are classified into categories like flammable liquids, toxic substances, or corrosives, depending on their properties. For instance, a solvent might fall under “Flammable Liquid Category 2,” while a cleaning agent could be “Skin Corrosion Category 1.” To do this, consult the safety data sheet (SDS) for the chemical, as it contains detailed hazard information. If you’re formulating a new product, you may need to conduct tests or rely on existing data.
When figuring out how to make a GHS label, this classification phase is foundational. It dictates everything that follows, from the symbols you’ll use to the warnings you’ll include. A common mistake is rushing through this step, leading to mislabeled products. Take your time to review the GHS classification criteria—available in official guidelines—and cross-reference with the SDS. This ensures your label accurately reflects the risks, which is a core part of how to make a GHS label that’s reliable. Once you’ve pinned down the hazards, you’re ready to move on to gathering the necessary details for the label itself.
Step 2: Gather All Required Information for the Label
After classifying hazards, the next part of how to make a GHS label involves collecting specific data points. GHS labels must include several key elements: product identifier, signal word (like “Danger” or “Warning”), hazard statements (e.g., “Causes serious eye damage”), precautionary statements, pictograms, and supplier information. Start by pulling this data from the SDS, particularly sections 2 (hazards identification) and 16 (other information). For example, if your chemical is highly toxic, you’ll need the appropriate hazard statement and a skull-and-crossbones pictogram.
In the process of how to make a GHS label, this step is about accuracy and completeness. I’ve seen cases where missing supplier details or outdated hazard statements caused compliance issues. Use a checklist to ensure you have everything: product name, signal word, hazard and precautionary statements, and contact info. This is also a good time to consider any additional requirements from local regulations, which might add extra elements. By thoroughly gathering this information, you’re laying the groundwork for a label that’s not only compliant but also user-friendly. Remember, the aim of how to make a GHS label is to communicate clearly, so double-check your sources to avoid errors.
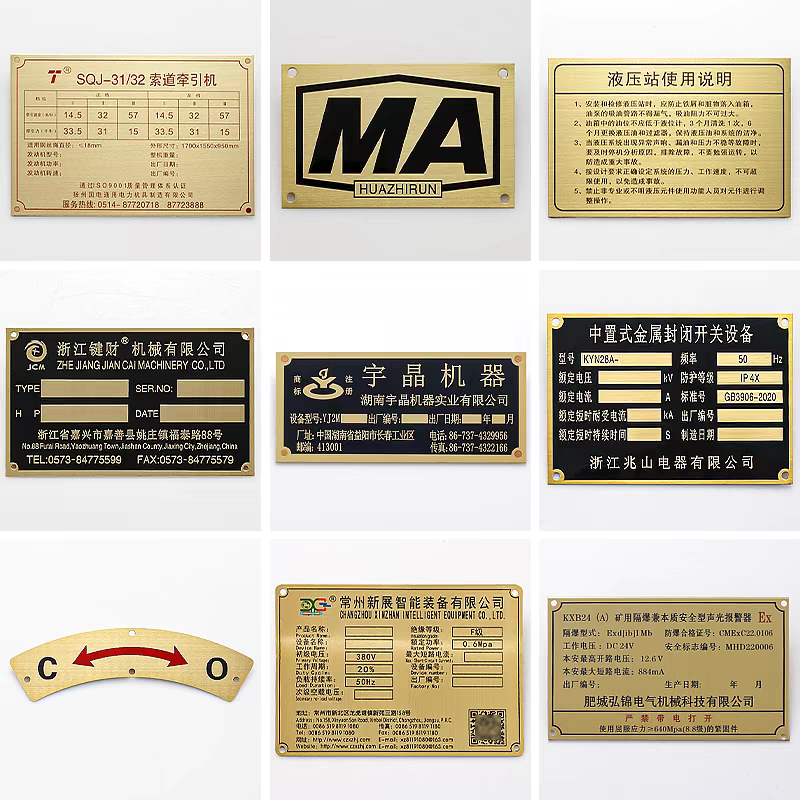
Step 3: Design the Label Layout for Clarity and Compliance
Once you have the data, the third step in how to make a GHS label is designing the layout. This isn’t about aesthetics alone—it’s about ensuring the label is readable and logically organized. GHS guidelines recommend a clear hierarchy: place the product identifier prominently, followed by signal words, pictograms, and statements. Use a legible font size and contrasting colors so that the label stands out on the container. Pictograms, for instance, should be in a diamond shape with a black symbol on a white background, and they need to be large enough to be seen from a distance.
When exploring how to make a GHS label, design is where many people stumble. A cluttered layout can confuse users, defeating the purpose of hazard communication. I recommend using templates or software tools that are pre-configured for GHS compliance; this simplifies the process and reduces design time. However, even with templates, customize the layout to fit your container size—for small packages, you might need to abbreviate statements while keeping them understandable. This step in how to make a GHS label emphasizes usability; test your design with a few colleagues to ensure it’s intuitive. After all, a well-designed label is key to how to make a GHS label that effectively safeguards everyone who handles the chemical.
Step 4: Add Pictograms, Signal Words, and Hazard Statements
Now, let’s get into the visual and textual elements that make a GHS label effective. This phase of how to make a GHS label involves integrating pictograms, signal words, and hazard statements based on the classification from Step 1. GHS has nine standard pictograms, such as the flame for flammables or the exclamation mark for irritants. Choose the ones that match your chemical’s hazards—but don’t overload the label; use only what’s necessary. Signal words like “Danger” (for severe hazards) or “Warning” (for less severe) help prioritize risks, while hazard statements provide specific details, like “Highly flammable liquid and vapor.”
In mastering how to make a GHS label, this step is critical because these elements are the first things users notice. I’ve found that mixing them up is a common error, so refer to the GHS purple book or online resources for accurate pairings. For example, if a chemical is both toxic and corrosive, you’ll include the skull-and-crossbones and corrosion pictograms, along with corresponding statements. When adding these to your label, ensure they’re placed consistently—usually, pictograms are grouped together, followed by text. This approach to how to make a GHS label enhances comprehension and aligns with global standards, making your labels universally understandable.
Step 5: Review, Print, and Apply the Label Correctly
The final step in how to make a GHS label is to review, print, and apply the label. Before printing, conduct a thorough review to check for errors: verify that all elements are present, the classification is correct, and the design meets size requirements. It’s wise to have a second pair of eyes—perhaps a safety officer—to catch any oversights. Once approved, use durable materials for printing, such as weather-resistant paper or vinyl, to ensure the label withstands handling and environmental conditions. When applying it, make sure the label is affixed securely to the container in a visible spot, not obscured by other markings.
This last part of how to make a GHS label is about execution. I’ve seen labels peel off or fade, rendering them useless, so invest in quality printers and adhesives if you’re producing them in-house. Also, consider the container’s surface—smooth surfaces hold labels better than rough ones. After application, train your team on how to interpret the labels, as this completes the cycle of how to make a GHS label work in practice. By following these five steps, you’ll have a reliable process for creating labels that protect people and meet regulations. Remember, how to make a GHS label isn’t just a task—it’s an ongoing commitment to safety.
Tools and Resources to Simplify the Process
While the steps above cover the basics of how to make a GHS label, leveraging tools can make the job easier. Various software programs and online platforms offer templates and databases for GHS compliance, allowing you to input chemical data and generate labels automatically. These tools often include built-in classification guides and update with regulatory changes, reducing the risk of errors. Additionally, refer to official GHS documents from the UN or local agencies for the latest criteria. When learning how to make a GHS label, these resources save time and ensure accuracy, especially if you handle multiple chemicals.
In the journey of how to make a GHS label, don’t overlook training materials. Videos, workshops, and checklists can reinforce your knowledge and help your team stay current. I’ve found that combining digital tools with hands-on practice streamlines the entire process, making how to make a GHS label less daunting. Whether you’re a beginner or refining your skills, these supports are invaluable for maintaining compliance and safety over time.
Common Mistakes and How to Avoid Them
Even with a clear process on how to make a GHS label, pitfalls can occur. One frequent error is misclassifying hazards due to outdated SDSs or incomplete data. To avoid this, always use the most recent SDS and double-check classifications against GHS criteria. Another mistake is overcrowding the label with too much information; focus on the essentials to keep it readable. Also, people often forget to update labels when formulas change, so implement a review schedule. By anticipating these issues, your approach to how to make a GHS label will be more robust and error-free.
In summary, how to make a GHS label involves a blend of science, design, and vigilance. By following these steps and using available resources, you can produce labels that enhance safety and compliance. If you have questions, the FAQ section below might help—and don’t hesitate to share your experiences in the comments. After all, mastering how to make a GHS label is a skill that benefits everyone in the chain of chemical handling.
Frequently Asked Questions (FAQ)
Q1: What is the main purpose of a GHS label?
A1: The main purpose of a GHS label is to communicate chemical hazards clearly and consistently using standardized elements like pictograms, signal words, and hazard statements. This helps protect workers, emergency responders, and the environment by ensuring that risks are understood across different regions and languages, which is a key aspect of how to make a GHS label effective.
Q2: How often should GHS labels be updated?
A2: GHS labels should be updated whenever there’s a change in the chemical formulation, hazard classification, or regulatory requirements. It’s recommended to review labels at least annually or whenever a new safety data sheet (SDS) is issued, as part of ongoing compliance in how to make a GHS label.
Q3: Can I use digital tools to create GHS labels?
A3: Yes, digital tools and software can greatly simplify the process of how to make a GHS label. They often provide templates, automated classification, and printing options, but it’s important to verify that the tool aligns with the latest GHS standards to ensure accuracy.
Q4: What are the consequences of not having a compliant GHS label?
A4: Not having a compliant GHS label can lead to serious consequences, including regulatory fines, legal liability, workplace accidents, and damage to reputation. That’s why understanding how to make a GHS label correctly is crucial for safety and legal adherence.
Q5: Are there any exemptions for small containers when making GHS labels?
A5: Yes, for very small containers where a full GHS label isn’t feasible, exemptions may allow simplified labeling, such as using only the product identifier and a hazard pictogram. However, you must check local regulations, as requirements vary, and this is an important consideration in how to make a GHS label for different scenarios.
Q6: How do I ensure my GHS label is understandable to non-English speakers?
A6: To make GHS labels understandable to non-English speakers, rely on the universal pictograms and consider adding translations for text elements if needed, especially in multilingual workplaces. This enhances the effectiveness of how to make a GHS label in diverse settings.


